Zoo Animal Photography
With the rise in popular photography that digital cameras have caused has also come a rise in people wanting things to photograph, and Zoos come pretty high up the list of popular places to take a camera to. Go to any given Zoo on most days and more likely than not you will come across all sorts of cameras, lenses and like-minded people quietly snapping away at some unsuspecting animal as it dozes in front of the crowd. I always used to wonder if the Tigers at my local Zoo associated the sound of shutters firing with the act of yawning as every time they yawned all the photographers who had been waiting patiently for the Tiger to do “something” would make use of all those teeth on display and quickly blast off a dozen frames.
There is a lot to be said about getting to know your subjects as well as the lay out of the Zoo. Many animals will have some form of routine, the most obvious of which is “feeding time”, but most will have other more subtle routines such as their favourite place to lie down or a “patrol route” around their territory. The more you get to know these routines the better the chances of getting a shot which shows some sort of behaviour. Getting to know the lay out of your Zoo will help with choosing the best places to wait and enable you to make the most of the conditions on the day. Many Zoos run some kind of annual pass scheme which can be useful if you aim to visit frequently, and the more frequently you visit the better the chances of getting something special!
The Basics
1: The Eyes. The eyes are nearly always the point of focus. You can be using a wide open aperture with a tiny depth of field but so long as the eyes are in focus the shot will be acceptable even if the rest of the animal tails off into a blurry softness. Most modern cameras have a number of focusing points that can be selected or moved around to ensure that the eyes are in focus. Either move the focus point to where the eyes will be when the shot is composed in the viewfinder or pre-focus on the eyes with a half press on the shutter button/focus lock button then compose the image in the viewfinder before taking the picture.
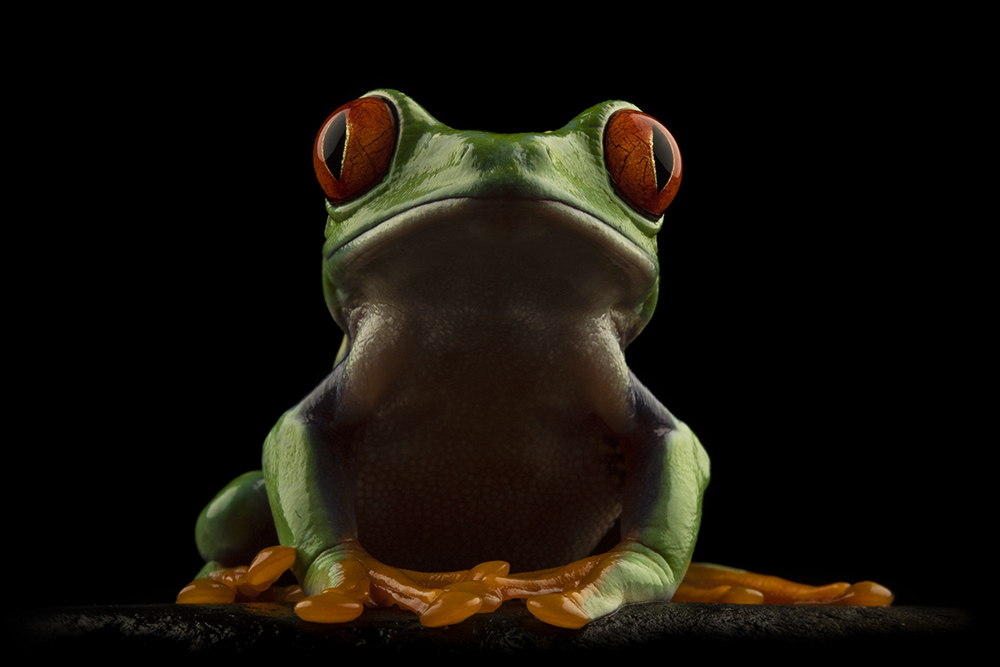
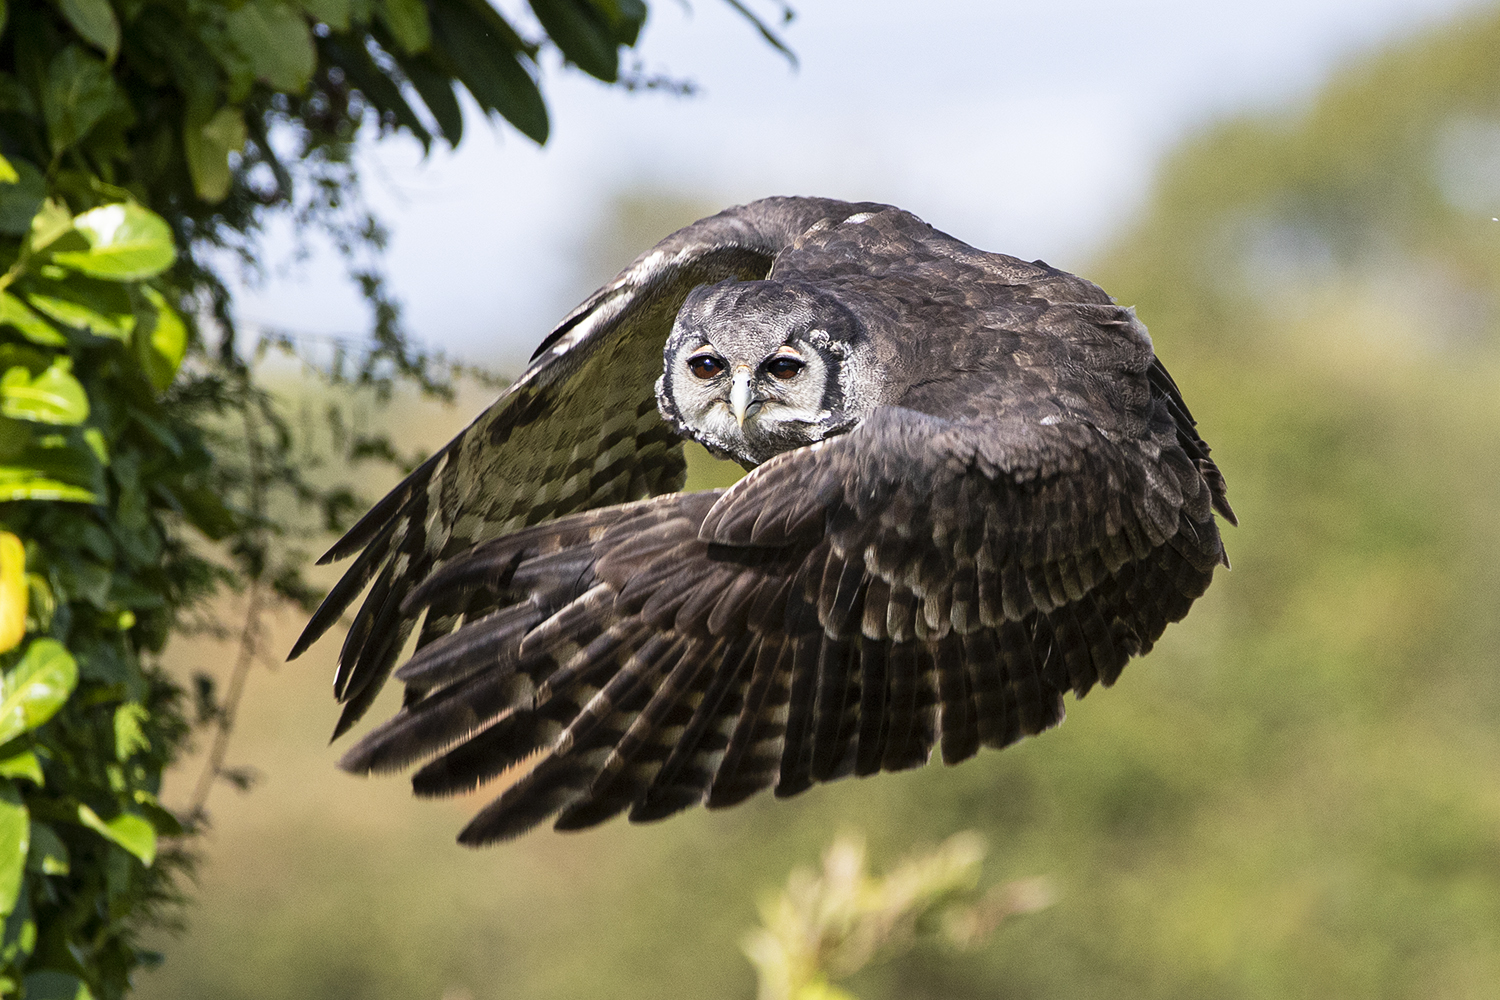
2: Composition. You often hear the phrase “give it space to look into” or “space to move into”, which generally means put more blank space in front of the face then behind. This is fine if the animal is side on, either sitting or moving, where the space in front gives it a natural direction. Sometimes giving it space to one side doesn’t work though, for example an animal that is facing you head on, or travelling towards you head on, often works better with a central composition. See the picture of the frog above which is facing the camera and positioned in the centre of the frame as opposed to the owl below which is facing towards one side.
3: Eye Level. Often images look a lot better if the image is taken at the same eye level as the animal that you are photographing, rather than looking down on them or up to the. Sometimes it pays to bring something to kneel or lie on, for example just a simple bin liner can be a waterproof surface to sit or kneel on, whilst weighing next to nothing and folding up small enough to fit in a pocket.
Dealing With Wire
When photographing an animal through cage bars or wire try to:
1: Use as wide an aperture as possible to achieve the narrowest depth of field, effectively blurring the wire out as much as possible. If you have a zoom lens then it often pays to zoom in as much as possible on the animal as well.
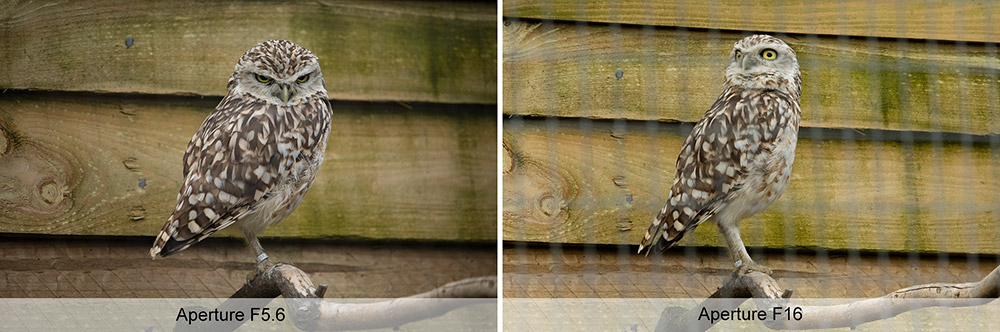
2: Choose an animal that is a reasonable distance away from the wire. Again the shallow depth of field should help to keep the animal in focus whilst blurring out the wire. Sometimes if an animal is close to the wire it will not be possible to blur out the wire enough.
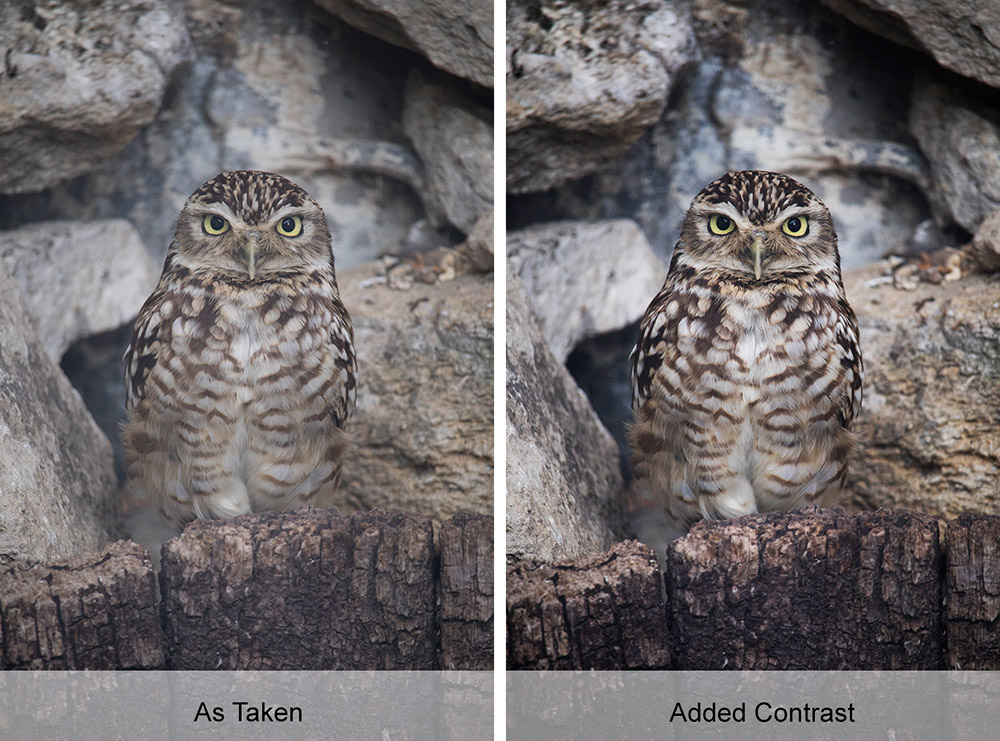
3: Use software to reduce the wire even further. Often cage wire is metallic and will cause a greyness on the image where it is blurred out. Adding a bit of contrast to these areas can help to minimise the effect. Sometimes a little bit of cloning out can help as well in areas where there is room to do so without destroying detail in the photo.
Animal Behaviour
Often Zoo animals appear to be nearly always resting or asleep. It pays to get to know your animals, their behaviour patterns, feeding times and favourite places to be and with a little patience you can usually get better results than simply walking past and snapping a few photos on the way. The more you get to know the Zoo routines the more likely it is that you can time your visit to take advantage of these opportunities as they occur.
Occasionally it is just not possible to get more than a record shot of an animal, for example if it is sleeping too close to the wire to blur the wire out or is hidden from view. Sometimes it pays to wait around in the hope that the animal moves, but often the animal has no intention of moving and will stay there for a long period of time. In these cases, unless you are specifically after photos of that particular animal, it may be better to move on to find something else that is in a better suited to being photographed that day.
Finally …
Take advantage of any Photography Days run by the Zoo. Often these will get you privileged access to the animals as well as allowing you to see behaviour that wouldn’t usually occur during the course of the animal’s normal day.
Always treat the animals with respect, even if they just won’t cooperate with you on the day. Don’t throw stones, bang on glass/wire, or try to feed them titbits. With Zoos at least you know that you can always go back again and the animal will still be there another day!